Off topic of my creative journey but are you looking for a good book to read? I'd like to suggest Just Look Up by Courtney Walsh. I look forward to reading her stories and hope she never stops! No pressure, Courtney! LOL! I've read all SIX of them and each time the story gets better and better :)
**I receive a complimentary advanced reader copy from Tyndale Publishing. The opinions are completely my own**
Thought CHANGE OF HEART (Courtney Walsh's last novel) couldn't be beat but JUST LOOK UP was even better! Could not put the book down - read it in one day.
Tug at the heart strings a bit because I can relate to the main character's childhood. Made me laugh and shed a little tear too. This story makes you think about job demands, family, love and how to balance it all. Loved that the locations are near me - Chicago and (small town) Michigan.
Well written and if you enjoy this book, you will love her other books as well.
Thanks for letting me make a suggestion :)
Pssst, she's coming out with another book - HOMETOWN GIRL which is now up for pre-order on Amazon. #CANNOTwait
**I receive products from Scrapbook Adhesives by 3L® and Spellbinders® Paper Arts for use in my projects. The opinions are completely my own based on my experience and doing so I can share what I personally love to use :) **
Let me show you how to create this dimensional banner!
For 16, repeat above step but without adding patterned paper. Once cut, you will add glitter to the front side by removing top liner and then pressing glitter over the exposed area. Tap off excess and set aside.
Cut Surprise Me Box Etched Dies Tag Die for a total of 12 with white cardstock. Apply a line of E-Z Runner® Grand Ultra Strong in the middle of two tags per box and center them together on top to form one shape. Remove the bottom liner of a letter and place on top of the two tags. Repeat for all letters and "16."
Close each end of box with an Adhesive Dots Large. Place one in the inside and squeeze all four sides to adhere (sometimes I used two Adhesive Dots if one didn't work).
Thread jute through the top of each box and it's ready to displayed!
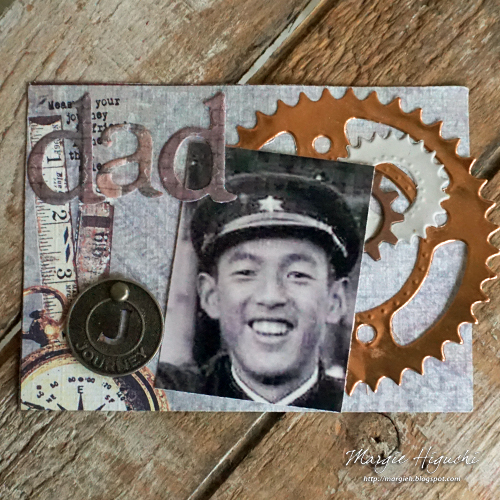
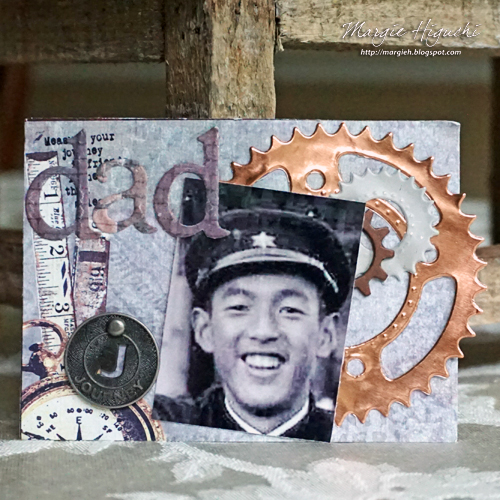
Today on Father's Day, I am up on Scrapbook Adhesives by 3L® Blog. Although my dad is not with me, I am always happy to CELEBRATE HIM :) A card wouldn't do so I decided on an ATC (Artist Trading Card) using mostly Adhesive Sheets to put it all together.
**I receive products from Scrapbook Adhesives by 3L® and Spellbinders® Paper Arts for use in my projects. The opinions are completely my own based on my experience and doing so I can share what I personally love to use :) **
Instructions:
Cut patterned paper into a custom ATC size (4.0 x 2.875 inches). Normally they are 3.5 x 2.5 inch - I like to be different ;)
Apply Adhesive Sheets 4 x 6" on the back of patterned paper and copper + white foil paper. See video at the end of instruction on the how to.
Die-cut patterned paper with alpha dies to spell out "DAD."
Die-cut copper and white foil paper with gears steel rule die.
Adhere to the ATC as shown in photo. Excess can either be cut or dust talcum powder to alleviate the stickiness.
Add metal gear piece with Dodz Adhesive Dots 3D (the exposed area will be covered by a photo).
Color copy a photo and cut to 1.625 x 2.125 inches. Adhere with E-Z Runner® Grand Dispenser. The vintage photo is of my dad as a Japanese high schooler :)
Punch a hole with a paper piercer in the ATC and add metal embellishment with matching brad.
Scrapbook Adhesives by 3L® Supplies: Adhesive Sheets 4 x 6" E-Z Runner® Grand Dispenser Dodz Adhesive Dots 3D Other:
Etched Dies and Tool: Spellbinders® Paper Arts (Sprightly Sprockets Set, Font One - Lowercase Set and Tool 'n One™); Patterned Papers; Foil Papers; Metal Embellishments; Brad; Talcum Powder; Photo
So this happened this morning! Didn't realize it was going to be announced today but what a way to bust the Monday Blues!! SO EXCITED to be a Brand Ambassador for Rita Barakat Designs!
What does that mean? It means I will be spread the good news about anything RITA BARAKAT!! She has products, in person and online classes, and social media events so there's something for everyone. To see her products, CLICK: Products - Rita Barakat.
I've known her for years and trust her integrity, creativity and SO MUCH HARD WORK behind everything she does.
See her blog post on details/introduction of the rest of the team (Design Team + Brand Ambassador Team) by CLICKING: First Ever Design Team!
I hope you all join all her social media platforms so you don't miss all the fun! To get you started, CLICK: LINKS! to Rita Barakat.
Wanted to edit to add a project I did with her first design (First Fairy Stencil from The Crafters Workshop), CLICK for its tutorial: An Elegant Door Knob Hanger Tutorial.
Thanks Rita for the trust you have in me!!
MargieH
Happy Mother's Day to all especially MY MOM!! I know I don't see you everyday and don't call as often as I can...will do better in that department. So while I was at a crop for mom crafters (and some young daughters came to craft with them - how sweet to witness!), I created a card for my mom...
**I receive products from Scrapbook Adhesives by 3L®, Spellbinders® Paper Arts and JustRite PaperCraft for use in my projects. The opinions are completely my own based on my experience and doing so I can share what I personally love to use :) **
This shaped card came together fairly quick by using just one etched die set (Diamond Effect - retired). The pink die cut was kinda of boring so I embossed it with Rose TableCloth Embossing Folder by Tammy Tutterow. Stamped a sentiment from Enjoy the Day Vintage Labels Four Clear Stamp Set by JustRite PaperCraft. Adhered everything with Scrapbook Adhesives by 3L® and added a May Arts Ribbon bow to finish. A sweet card to give as a Mother's Day or a birthday card.
Yesterday I attended the Mom's A Scrapping crop event and surprisingly got a lot done! I usually (maybe) complete ONE PROJECT because I'm talking or eating too much! LOL!! Made a couple of new friends and got to see friends who were first timers at my friend, Kristin's event :) Isn't this front so SPRING?! Love the light box touch, Kristin! LOL!!
Since this was a no frill crop, lunch was on your own. I purchased this ADORABLE strawberry lunch box (bento box) from my local Japanese supermarket and BONUS: on sale for $2.50!!! I grabbed it while my husband rolled his eyes until he heard the price - HA! Leftovers from last night's dinner with salmon flakes on top of the rice.
These sweet ladies I've known from other events and was their first time at this one. LOVE unexpected surprises! Great to see them!
Edit to add my Mother's Day Lunch I had with both boys in town at Yu's Restaurant :) VERY PROUD of these two young men...one is almost done and the other is about to transfer into DePaul University in Chicago IL. #GoDemons
Hope you have a FABULOUS DAY!! As always THANK YOU for taking time to visit me on the blog :)
MargieH
Happy Easter Greetings to you all! Today I'm on Scrapbook Adhesives by 3L Blog sharing this sweet Easter card full of dimension using 3D Foam Squares and adhered with a combination of E-Z Runner® Grand and Adhesive Dots Micro to showcase an adorable bunny image from Flourishes LC. I've added layers of Spellbinders® die cuts and My Mind's Eye patterned papers to finish the look.
**I receive products from Scrapbook Adhesives by 3L®, Spellbinders® Paper Arts and Flourishes LC for use in my projects. The opinions are completely my own based on my experience and doing so I can share what I personally love to use :) **
Let's start by stamping the bunny in the Vintage Easter stamp set with black ink. Color the bunny with watercolor pencils. I used pink for tender areas of the bunny and then layered with brown color. After I achieved my look, I fussy cut the bunny.
I outlined the edges of the bunny with black watercolor pencil. Note the difference between the right (edged with black watercolor pencil) and the left (without the edging).
Stamped my sentiment onto patterned paper with black ink, using a stamp positioning tool.
With the bunny shape as a guide, I was able to determine where to place my Spellbinders oval die template. To frame the oval shape, I used a Scalloped Oval. Now to cut and emboss with my die-cutting and embossing machine.
The bunny popped up with dimension with 3D Foam Squares - Black Mix. Some I cut in half to fit around its ears and feet! Place it on top of the oval die cut.
The scalloped oval and oval die cuts were adhered together with E-Z Runner® Grand.
I also stamped a sentiment and egg accent design inside the card to make it more personal.
The sweet floral trim was secured with Adhesive Dots Micro in each center of the flower and placed it across toward the bottom of the card front. Then added a mini self-adhesive pearl on each exposed flower center.
Lastly I added a combination of Regular and Small sizes from 3D Foam Squares - Black Mix to the back of the matted bunny oval (leave room for the trim). Center onto card front and you're done! Another look...
Hey everyone! I have something exciting to show you from Creativations 2017 trade show for all you stampers. Animation Clear Stamps by Uchi's Design.
**I receive products from Uchi's Designs and Scrapbook Adhesives by 3L for use in my projects. The opinions are completely my own based on my experience and doing so I can share what I personally love to use :) **
Here's the stamps in action - courtesy of Ken's Kreations...
I cut TWO of the tabbed die cuts: one keep as is (will house the grid) and the other trim off the tabs (back cover of card).
With a coordinating patterned paper, make an A2-sized (4.25 x 5.0 inch) card base.
Apply adhesive on all four sides of the A2 card with E-Z Runner® Ultra and adhere to the tabbed die cut. Place fold side of A2 card on the edge of the inside scored line of tabbed die cut.
Next fold the tabs down onto the A2 size card, center the smaller label die in between the tabs and secure with repositionable tape. Run it through your manual die cutting machine. It will cut a window through all the layers.
Cut the grid to fit the tab and cover the window (leave an extra stripe over the right edge as seen in second image below). Place adhesive on the tabs and put your grid over them to secure.
Apply E-Z Runner® Ultra adhesive in the scored area of the back cover. Place it on the top edge of the card base (opposite of the tabbed edge) to create an accordion fold as seen in the next three images.
Set aside and let's work on the image! I loved the owl with the moving heart on his tummy. Stamp with black ink onto white cardstock. Trim and apply adhesive to the inside back cover - I used the grid as my guide.
To finish off, I applied 2 inch of adhesive on the inside, right above and below my grid to secure in place.
I nested my two labels together, secure with repositionable tape and ran it through my manual die cutting machine to create a frame. Do this twice - one for the outside and one for the inside for a finished look.
I used E-Z Runner® Micro because it has an 1/8 inch narrow adhesive strips and it can curve with the frame shape.
Next I cut a ribbon tail banner (also included in the Animation Die Cut - Animation Card DC101!) and adhere it with 3D Foam Squares. I hand wrote out my sentiment "Hello Friend" in gel pen that was close to my color scheme.
For the finishing touch, I added these pretty plastic flowers with Adhesive Dots 3D. I cut the adhesive dots to make them smaller so I can layer a pair of blooms and adhere the centers without worrying about them getting loose.
Here's another look on the inside and outside of card...
Such a FUN + CLEVER stamp product idea! If you love it as much as I do, tell your favorite retailer to order or go to and order at: Uchi's Design Animation Stamps, Dies + Grid.
 Just Look Up by Courtney Walsh