Since Teacher Appreciation Week coming up in May (you knew that, right? lol!), I created a teacher's gift using all sorts of stuff I had in my scrap area. This is what I came up with!
 |
| Thank You Standing Clipboard by Margie Higuchi Cardstock: Core'dinations (Cosmo Cricket Neutral Collection and Jenni Bowlin Red & Black Collection); Chalkboard Paper: Canvas Crop.; Patterned Paper: Cosmo Cricket; Stamp: Mint Motif; Ink: VersaMark, Clearsnap; Embossing Powder: Stampendous; BingoCard: Jenni Bowlin; Button: Dress It Up; Binder Ring: Tim Holtz; Tool: Spellbinders (S4-310 Labels Eighteen, LF-126 Grand Squares); Other: Library Pocket/Card, Mini Clothes Pin & Charm |
Using my Grand Calibur, I cut/embossed the largest size in the Grand Squares with a thin cardboard (think cereal box thin) and Core'dinations cardstock to cover over the cardboard. Then in the back I added an adhesive back easel stand that I purchased at an office supply store.
What I loved about Core'dinations in this project was its durablity...I mean look what I did to a piece of their cardstock?!

The ABUSE - it still held up! LOL! This is the mat behind the picture of my son, Hiroyuki, and his teacher. It turned out to be a great frame for the picture :0)
My next project is a scrapbook layout I created for my hubby (yes, need those brownie points for future scrapbook purchases...heehee!!) and his favorite pastime - GOLF! I had all the papers and pictures in a 12x12" clear envelope for months. Well, at least I was organized in a small way ;0P
 |
| Golf by Margie Higuchi Cardstock: Core'dinations (Graphic45 Timeless Collection & Cosmo Cricket Neutrals Collection); Patterned Paper: Graphic45 (A Proper Gentleman Collection); Metal Accent: Tim Holtz; Adhesives: SCRAPBOOK ADHESIVES By 3L 3D Foam Squares, GlueArts & Xyron 150; Tools: Quickutz (Diesel Font), Uchida Marvy Circle Punch and Spellbinders (S5-029 Nested Lacey Pennants, Narrow Ribbon Tail); Other: Button |
To save some of the wonderful papers, I cut them so that no one will ever know unless I tell so I'll just show you pictures - my lips are SEALED! LOL!!

OK....I lied...the middle picture I need to explain. I had the four pictures lined up to where I wanted them. Lightly penciled the edges, put the pictures aside and sanded the penciled area (erasing the lines as I went along). Sanding the embossed area, I created a "mat" for the pictures...less layer.
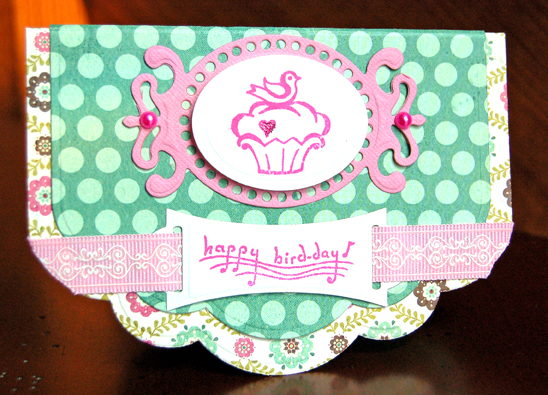
The last project I created was a birthday card - yes, this was posted yesterday but it is made out of Core'dinations too and I loved the colors! I shifted the flower and the sentiment over to the right so technically it's new, right? HAHAHA!
 |
| Happy Birthday by Margie Higuchi Cardstock: Core'dinations (Core Essentials Collection); Patterned Paper: TaDa Creative Studios (Abode a la Mode Collection); Stamp: Flourishes; Ink: Stampin' Up; Bling & Pearl Swirl: KaiserCraft; Adhesives: SCRAPBOOK ADHESIVES By 3L, GlueArts & Beacon Adhesives; Tools: Spellbinders (S5-029 Lacey Pennants, Ribbon Tail, LF-161 Grand Labels One); Other: Bakers Twine |
To make the flower in the card, I tore a piece of the Core'dination cardstock into a (attempted) circle and then tore a swirl.

Then I rolled it into a blossom and dabbed a drop of liquid adhesive to the end to secure. To give more dimension, I rolled the edges back and sanded some areas until I got the look I wanted. For a finishing touch, I added the bling and adhered to the card. I better send this card off soon!
Here are some my favorite projects I have done in the past using Core'dinations:


I enjoy creating with Core'dinations. Matter of fact, a few days ago I just picked up Tim Holtz/Ranger Distress Collection to split with a friend. Can't wait to create with those sheets :0)
Thanks for stopping by!