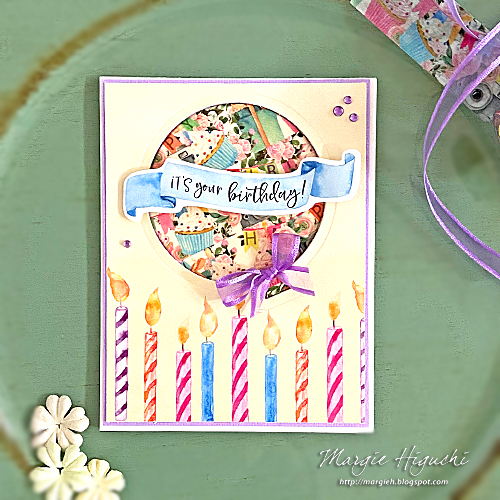
This Washi Birthday Balloon Card is part of the Kawaii Paper Goods Subscription Box Volume 2 Challenge! All the details are in my previous post, click: Celebrate Tea & Treat Holder post.
What is Kawaii Paper Goods? They are a NEW paper company from Japan and have the most kawaii (cute/adorable in Jpn) designs. The paper is about 80+ lbs and of good quality. They have retailers in the U.S. carrying their collections like my favorite online store, The Button Farm, where I purchased mine.
The subscription box is a quarterly kit full of exclusive papers and embellishments that will not be sold outside the kit. The challenge is open to those who purchased the kit and is worldwide. The winner receives a $30 Kawaii Paper Goods gift certificate and highlighted on their social media.
There five-category challenges (deadline: 10/29) and this is my card entry. Are you interested? Better hurry! Click Kawaii Paper Goods Subscription Bx Vol 2 Challenge (Public FB Post)!
**I receive products from Spellbinders® Paper Arts, and Scrapbook Adhesives by 3L® for use in my projects. The opinions are completely my own based on my experience and doing so I can share what I personally love to use.**
Washi Birthday Balloon Card
Let's start with the layers. Cut a piece of 4 x 5.25-inch patterned paper and a piece of 4-1/8 x 5-3/8-inches purple cardstock. Adhere the patterned paper on top of the purple cardstock with E-Z Runner® Grand Refillable Dispenser. My white cardstock card base is an A2 size (4.25 x 5.5-inch).
Die-cut a 3 x 3.5-inch balloon shape into the layered card panel. This will be the base of your focal design.
Using the washi tape, cover the balloon shape. Trim off the excess, leaving a little border. Wrap the excess border in the back to create a colorful balloon! Set aside.
Behind the layered panel, cover the entire back with Crafty Foam Tape. Then apply adhesive on the back of the balloon shape.
First, add the panel onto the card base and then add the balloon shape to complete the card front.
Now to add details. I made a bow and place it on the bottom of the balloon with an Adhesive Dot Medium. Add a few Sparkly Bubbles in Light Purple. Lastly, I added a sentiment banner from the Ephemera Pack. To pop it up, I stacked two layers of Crafty Foam Tape behind it and added it to the card.
I hope you enjoyed this project. Give it a try! If you haven't already, please follow me on the blog or my ILscraps Instagram.
Thank you so much for stopping by!
MargieH
Creative Time: 35 minutes
Skill Level: Intermediate
Materials Needed:
Kawaii Paper Goods
Subscription Box Volume 2 (Time to Celebrate 05 patterned paper, Washi Tape and Ephemera Die Cuts)
Sparkling Bubble Rhinestones in Light Purple
Scrapbook Adhesives by 3L®
E-Z Runner® Grand Refillable Dispenser
Adhesive Dots Medium
Crafty Foam Tape 108ft.
Spellbinders® Paper Arts
DI-0388 Uplift Die Set (ret.)
Platinum 6 Die-Cutting and Embossing Machine
Other
White and Purple Cardstock; Purple Ribbon; Scoring Tools; Paper Trimmer; Scissors


1 comment:
Wonderful card design.
Post a Comment