Pages

Thursday, March 24, 2016

FaveCraft CHA Bloggers Event: Craft 2016: Dream DIY Gold Altered Clipboard

This Gold Dream DIY Clipboard is entered in FaveCraft Best Blogger Crafts 2016 (until 4/6). I would love your support by voting for my project


Today I am sharing a clipboard that I created from scratch using chipboard, metallic gold material, coloring book page, black cardstock and a word sticker! Lots of materials but love the end result. Let me share my process...


Die-cut three rectangles from Spellbinders® Grand Rectangle Die #5 (the smallest sized die is #1): one each of chipboard, Fairfield™ World Oly-Fun™ Metallic Gold material and black cardstock.


Apply Scrapbook Adhesives by 3L® Girlie Grunge Art Medium with a foam brush and adhere the rectangle chipboard and gold metallic material die cuts together.


While the clipboard base dries, die-cut another rectangle out of Leisure Arts Floral Wonders Color Art coloring book page.


Color the page with Testors® .25 oz acrylic paints and a paint brush for a vibrant accent to the clipboard.


After the paints dried, trim the page to the desired size and added the "dream" sticker in the center.


Trim the black cardstock rectangle to the desired size and adhere with Scrapbook Adhesives by 3L® Extreme Double-Sided Tape 1/2".


Use the gold metallic material scraps to cut strips to create a border on the top and bottom of the coloring piece. Secured with Extreme Double-Sided Tape 1/2".


Die-cut Sizzix® Easel Die with chipboard and secure with Extreme Double-Sided Tape 1/2" on the back. Add the clip on top and it's ready to be displayed!


Thanks for stopping by :)
MargieH

Materials List:
Fairfield™ World (Oly-Fun™ Metallic Gold)
Leisure Arts (Floral Wonders Color Art For Everyone Coloring Book)
Testors® (0.25 oz Acrylic Paints)
Sizzix® (Easel Die)
Core'dinations ColorCore Cardstock® (Black Cardstock)
Scrapbook Adhesives by 3L® (Girlie Grunge Art Medium and Extreme Double-Sided Tape 1/2")
Spellbinders® Creative Arts (LF-132 Grand Rectangle Die #5)
American Crafts (Dream Thickers by Amy Tangerine)
Chipboard; Foam Brush; Clip

Tuesday, March 22, 2016

Embellished Filigree Easter Egg Tutorial

Wanted to share this Easter Egg Box I embellished - picked up it up at JoAnn Fabric & Craft Store - so pretty with the filigree top!

Recently I received a box of paints from Testors® Corp from a bloggers' event I attended at CHA (Craft & Hobby Assoc.) trade show in January. They had a beautiful selection of paints. I paired one of them with Authentique Paper, one of my favorite paper manufacturers, newest Cuddle Boy Collection and it was a perfect match! What do you think?


I painted the filigree box top with Testors® Craft Paint in Island Breeze, about two coats (dry time between coats). Set aside to dry.


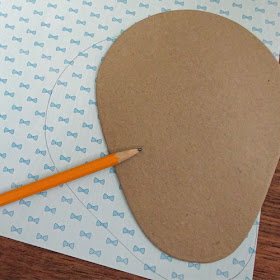
While the top dried, I traced the detachable back of the box top with Cuddle Boy Five patterned paper and pencil. Trim with scissors and adhere using Donna Salazar with Scrapbook Adhesives by 3L® Girlie Grunge Art Medium. Set aside to dry.


Paint two coats on the top and bottom edges of the box. Dry time for each coat. Set aside. With two 1.75 x 12" strip of Cuddle Boy Five patterned paper, paint the edges so it blends into the painted areas of the box.


Adhere the strips of patterned paper on the side of box with Girlie Grunge Art Medium. Let dry and trim off the excess paper. Repeat the same process for the box top sides with two 1 x 12" strip of Cuddle Boy Three patterned paper.


Die-cut Spellbinders® Reflections Die with green striped patterned paper. Place Scrapbook Adhesives by 3L® 3D Easter Shapes Bunny in the center of die cut. Remove liner and sprinkle Stampdenous Micro Glitter. Press firmly and shake off excess glitter.


Use Scrapbook Adhesives by 3L Dodz™ Small (clear double-sided adhesive dot) to secure the embellished die cut on to the box top.


Fill with "grass" (I cut some leftover green patterned paper with a fringed scissors) and candy.


What will you be creating for Easter? Share by linking your project in the comments section of this post - would love to visit & see!

Thank you so much for stopping by!
MargieH

Thursday, March 17, 2016

Scrapbook Adhesives by 3L: Green and Gold Lucky Tag using 3D Foam Products

Everyone is Irish today including me - lol! Today I am sharing a cute tag to celebrate the occasion by featuring a couple of the 3D Foam products on Scrapbook Adhesives by 3L® Blog.


I'll share a few sneaks with you...


Come visit the rest of the step outs and detailed supplies list by clicking here: Green and Gold Lucky Tag using 3D Foam Products post!

As always, thanks for stopping by!
MargieH

Monday, March 14, 2016

Design Memory Craft: Altered with Love and Texture Luxe Copper Tutorial

This is my last blog post over at Faber-Castell® Design Memory Craft® Blog for this term as Guest Designer. I so enjoyed my time there and the products this Company offers.

I had the opportunity to first play with the Texture Luxe™ Copper at CHA (Craft & Hobby Assoc.) 2016 Mega Conference & Trade Show back in January. LOVE the richness in color and the creamy-ness of the product :) I have altered a mint tin featuring this wonderful medium in many different ways.


Interested in seeing more of my other techniques? Visit Altered with Love and Texture Luxe - Copper Tutorial.

Thanks for stopping by!
MargieH

Friday, March 04, 2016

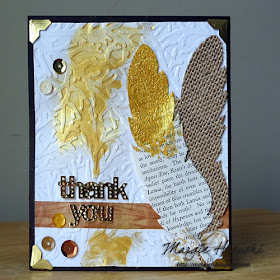
Scrapbook Adhesives by 3L: Pigment Powder Gold Feather Thank You Card

Excited to share my Gold Feathered Thank You card (part of an ensemble) that was displayed at the CHA (Craft & Hobby Assoc.) Mega Trade Show. It is featured on today's Scrapbook Adhesives by 3L® Blog! You may remember my altered tin covered in Tissue Tape from Donna Salazar with Scrapbook Adhesives by 3L® line.


Come visit my Pigment Powder Gold Feathered Thank You Card post for detailed instructions and full supplies list!

THANK YOU for stopping by!
Have a wonderful weekend,
MargieH